
Intake manifolds are typically cast and consequently can end up with casting flash and misshapen ports due to mold shifts. If you are porting your cylinder head you already have all the supplies you need to also port your intake.

Tools and Equipment Needed:
- Air Compressor
- Die Grinder
- 1/4 inch Shanks
- 80 and 120 Grit Sanding Scrolls (Harbor Freight PN: 62394)
- Dremel with Flex Shaft
- 80 Grit Thin and Thick Flap Wheels (Dremel PN: 502 and 504)
- 120 Grit Thin and Thick Flap Wheels (Dremel PN: 503 and 505)
- Cylinder Head
- Safety Glasses
- Gloves
- Respirator Mask
- Intake
- Bright Lights
- Intake Gasket
- Digital or Slide Calipers
- Machinest Die and Scribe or Sharpies
- Painters Tape
Understanding Intake Porting
Before you attempt porting you should read up about what you are trying to achieve and watch a few videos. A good reference book is Theory and Practice of Cylinder Modification by David Vizard. I also recommend using your tools on a similar material so you can get a feel for the amount that is removed with each pass based on revolution speed, pressure and contact duration. If you don't have spare material around you can always try cosmetic clean up of the exterior casting.
Intakes are typically cast and consequently can end up with casting flash and misshapen ports due to mold shifts.
Grinding and sanding on intakes will produce a lot of fine metallic particles and dust, make sure you have proper safety equipment; safety goggles, gloves and a particle filter respirator mask.

Measure out the Ports
You don't want to go crazy and start hogging out the ports making them huge. The ideal port tapers down from the throttle to the valve with a throat in the valve bowl. The intake is part of this taper, so you just want it to be a smooth transition from intake to cylinder head port. You don't want a big bulge, but that is what you will get if you start hogging out a lot of material. For the intake ports it is ok if there is a small step down from the intake manifold to the cylinder head but not the other way. For example the intake manifold opening is smaller than the cylinder head. But you don't want the cylinder opening to be smaller than the intake as this will create a wall the air hits and consequently poor flow. For the exhaust ports you want the step to be the other way. Exhaust side bigger than the head exhaust port.
Paint some machinist die on the cylinder head ports, mounting surfaces and the intake.
Place the intake/exhaust gasket you plan to use on the head using the studs, position it where you are happy and it minimizes any gasket overhang. If there is gasket overhang you might have the wrong gasket or need to do some very minor trimming. You can tape it in place using painters tape but be careful not to mess up any finish on the sealing surfaces.

With a scribe or sharpies mark the location of the gasket on the head and also mark any part of the ports that stick out beyond the gasket. On a Datsun head this should be minimal.
Now lower the intake into place over the studs and position it on the gasket. Mark the outline of the intake on the gasket so you can relocate it. Looking down through the larger throttle ports see if there is any material impinging on the flow path. Use a lot of very bright light to make sure you can see. You may have to take the intake off and on a few times to double check.
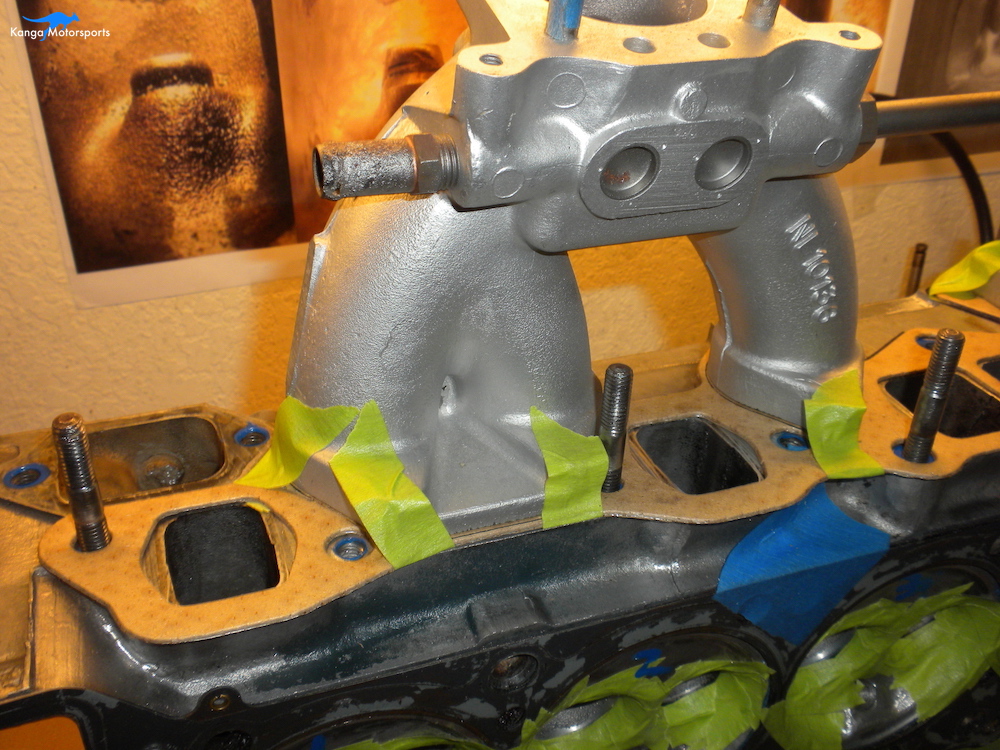
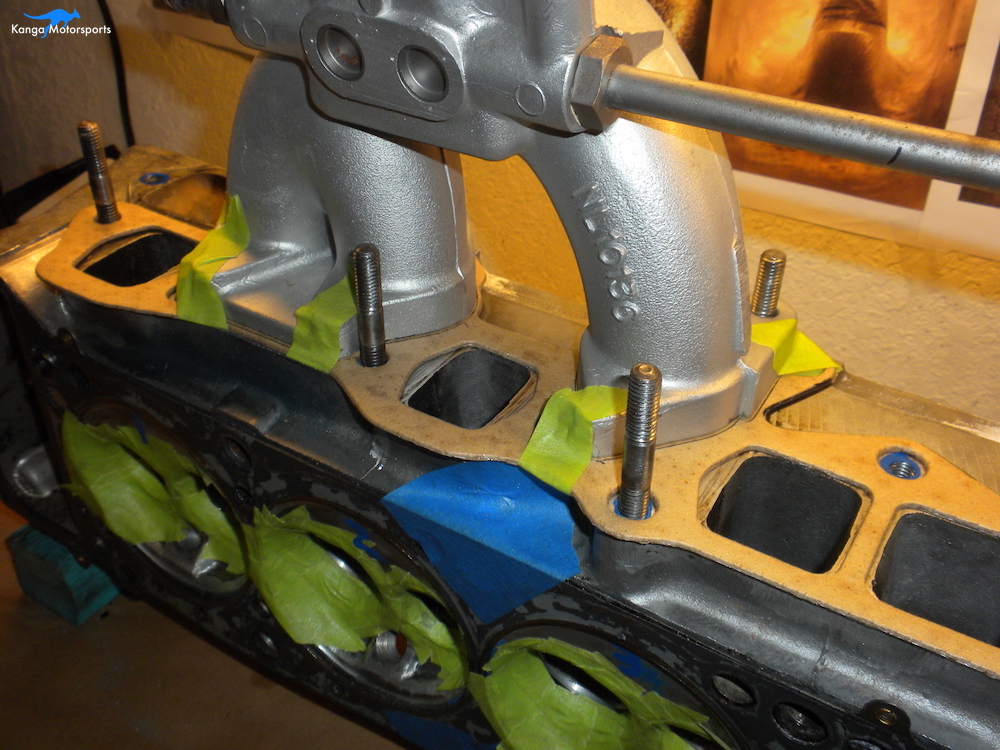
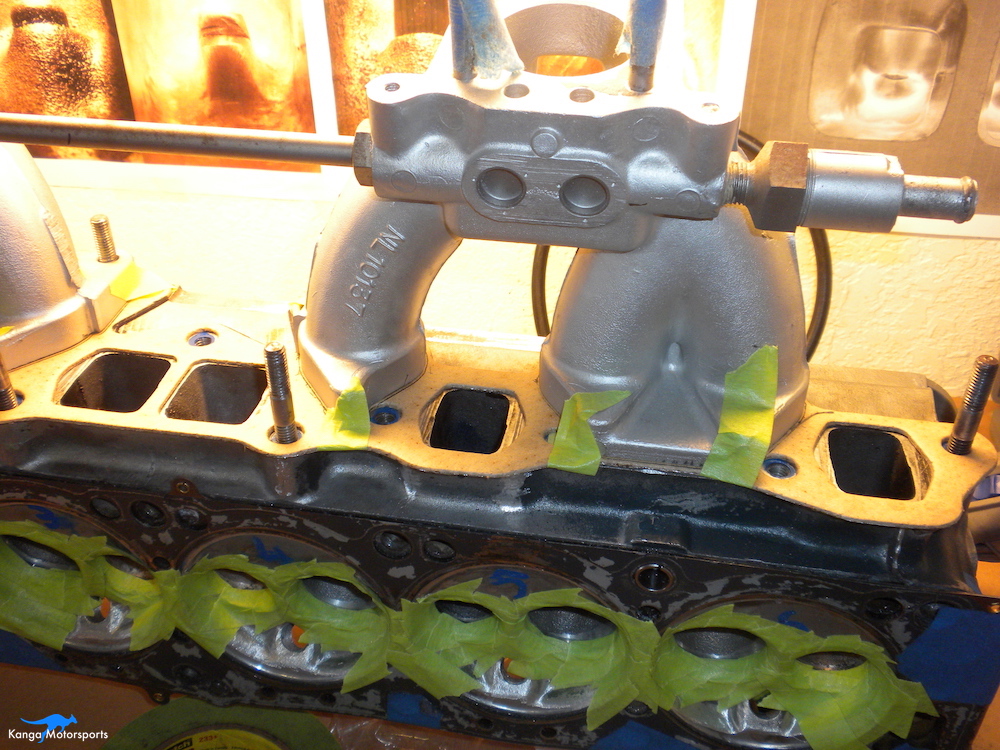
With the intake positioned on the gasket, tape the gasket in place to the intake using the painters tape. Then remove the tape holding it to the cylinder head. Carefully lift up the intake and gasket together without moving the position of the gasket.
Some racers will even dowel pin the intake/exhaust gaskets in place to ensure they do not move.
Turn the intake upside down and now scribe/mark where the intake impinges past the gasket. Again there should be very little material. If there is a lot you want to check you have the right gasket, it is positioned correctly and that the intake is in good shape. Repeat these marking steps until you are happy.
I like to also measure the ports with digital calipers at multiple locations to confirm the sizes between the cylinder head and intake.

Matching the Intake Ports
With the intake marked you can now start the process of removing the extra material.
Be slow and methodical you don't want to remove too much material or mess up and damage the mounting surfaces.
I do not recommend using carbide burrs for the intake. I found that only a little bit of material needed to be removed so sanding scrolls and flap wheels would be sufficient and effective. Yes you can use a Dremel for porting but you shouldn't they really are not designed for it. A Dremel is low torque motor that operate at higher speeds. You want a high torque motor at variable lower to medium speeds. I burned up at least one Dremel and the second one is on it's way out. I use two different die grinders with mandrels and sanding scrolls. One is straight the other is 90 degrees, access and the area being worked determines which one to use based on control, reach and comfort. I then use the Dremel with a flex shaft for finer details or hard to reach areas.
Remove the Casting Flash
First thing you will want to do is remove the coarse aluminum casting flash and any other casting imperfections.

Start using 80 grit sanding scrolls or an 80 grit flap wheel. The sanding cones are good for harder to reach spaces or curved surfaces. The cylinders are good for transitions, straight or slightly tapered areas. Don't remove too much material you just want to remove the casting flash but without creating large grooves or dimples.

Smoothing Out the Ports
Once you have removed casting imperfection you can start smoothing out the intake ports interior surfaces. Smoothing transitions and a general clean up. Again don't remove large amounts of material your goal is to clean everything up removing the least amount of material possible.
Using the 80 grit sanding cylinders remove the marked/scribed excess material to shape the intake exits that you marked previously. You want to make sure the transition is smooth and tapered not just hogged out at the port opening. I also like to leave a little material on the port shaping for when I do the pass with 120 grit. If you remove it all using the 80 grit then you will take too much off when you use the 120 grit.
Once you have completed the 80 grit work switch to 120 grit. Don't be in a rush to go to 120 grit you want to make sure you removed the excess material, smoothed the transitions and removed any cast flash.

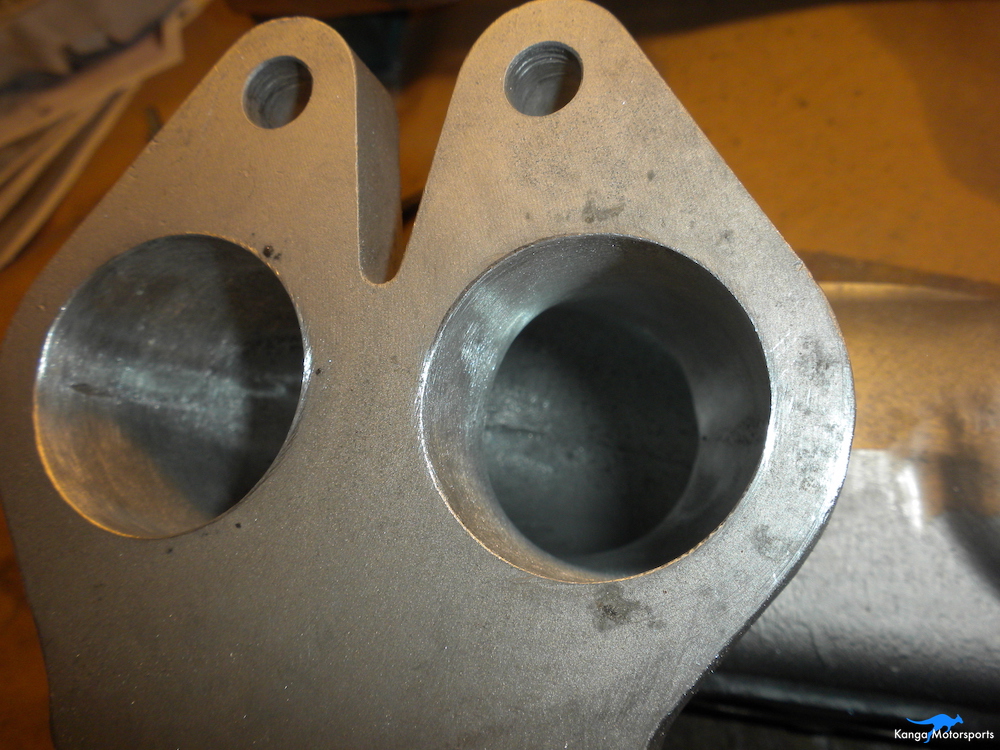
After using the 120 grit sanding scrolls and flaps wheels the intake should have smooth tapering ports matched to the gasket and cylinder head ports.

After a lot of reading most people point out that for carbureted engines you want some surface roughness similar to 120 grit. I don't have any first hand experience whether a smoother surface is better or not. Perhaps in the future someone can test a 120 grit ported intake against a smooth polished intake.

Enjoy your handy work for a moment and then it is time for the next component, that engine isn't going to build itself. In the next article we disassemble the F54 engine block and see what condition it is in.
Other Datsun Engine Build Articles


