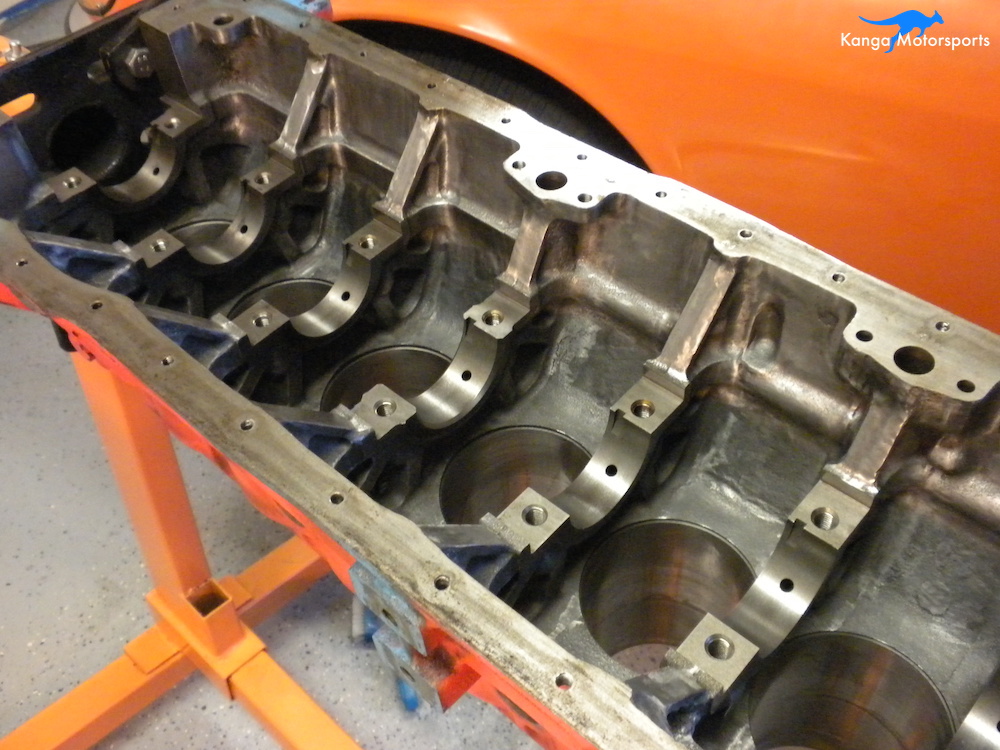
With all the modifications, preparations and upgrades complete on the engine block it was time to get rid of that horrible looking outer surface and give it a fresh coat of paint. Prior to painting we had a fresh top surface cut into the block and also chased all the threaded holes with a tap to clean out the decades of grime and rust.
Tools and Equipment:
Engine Block
Engine Stand
Duplicolor Engine Enamel DE1612 Grey Primer
Duplicolor Engine Enamel DE1610 Pontiac Blue
Masking Tape Various Sizes
Razor Blade
Scribe
Pick or Small Screw Driver
Wax & Grease Remover
Coffee Filters
Denatured Alcohol
Safety Glasses
Powder Free Nitrile Gloves
Air Compressor
Siphon Gun
Low-Oder Mineral Spirits
Drip Tray
Air Gun Spray Nozzle
Tweezers (Optional)
Cleaning the Engine Block
Before we could get started painting the block we had to give it a good clean to make sure the outer surface was clear of dirt, grease and grime that would provide a bad surface for the paint to stick too or ruin the final finish. We also had the top surface decked and needed to remove debris left over by the cutting process. Previously we had cleaned out the engine block with Simple Green and water pressure. This time we followed the approach taken with the cylinder head cleaning and used a siphon gun with low oder mineral spirits.

Make sure to do this in a well ventilated area. We did this outside with a drip tray to collect the excess mineral spirits and gunk. We filter the mineral spirits and use it to soak difficult to clean engine and car parts.
The pressure of the siphon gun really helps get rid of any built up debris and the mineral spirits removes the greasy and grimy deposits.

Afterwards we spray the excess mineral spirits off the block with dry clean compressed air. It is a good idea before you get started to completely drain your compressor from the bottom drain valve to remove any water or moisture that might have built up over time from pumping in damp or humid air.

Then we wipe down the damp block with coffee filters to remove any dirt and films to leave a nice clean surface.

Let the block dry out in the sun and then go over the block again with compress air to remove any fibers or lint left behind by the coffee filters.

Make sure the block is completely dry before proceeding to masking, otherwise you might find that the masking tape comes undone during painting making a real mess.
Masking the Engine Block
Now the block is clean it is time to protect the machined mating surfaces and threads from getting ruined or gummed up with paint. Make sure to use clean gloves so you don’t get your oily finger prints all over the freshly cleaned surfaces.

We use wide painters tape to protect the large block deck surface and underside. The great thing with cast iron blocks is they have a nice hard edge. You can use these edges to cut the perfect shape by just running a scribe back and forth over the surface imprinting and cutting any excess painters tape.

We also mated the aluminum front cover to the block to trace out where it fit on the front machined surfaces and where paint would be needed to protect the cast iron.
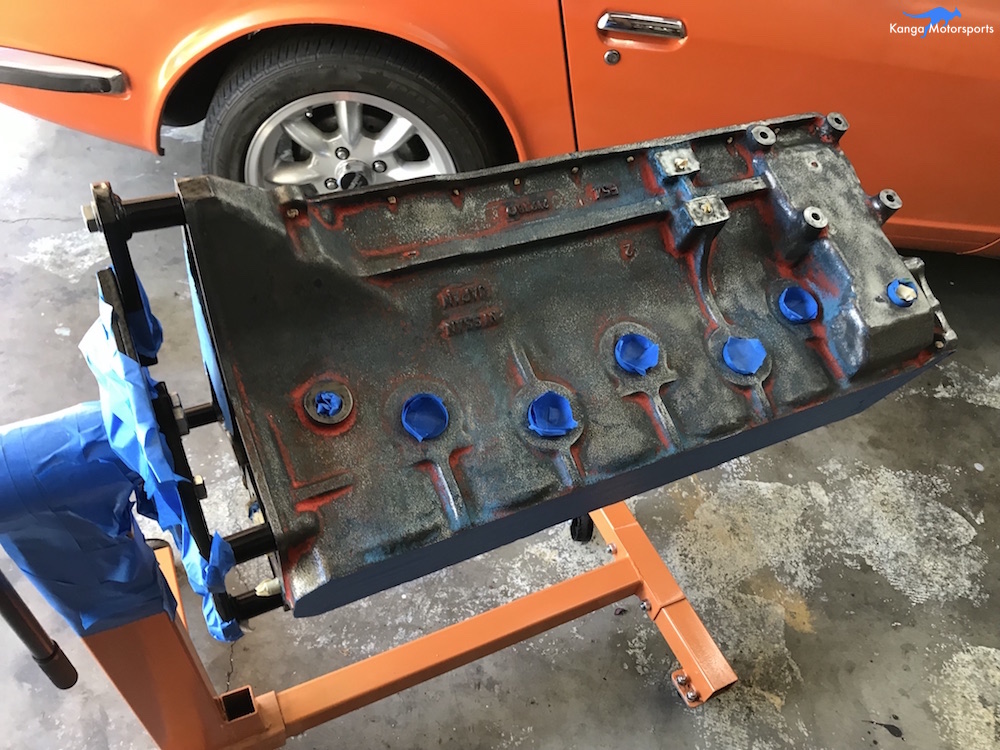
The hard part about masking is all the little details like core plugs and threads. Threads can be protected by balling masking tape and pushing them into the threaded holes with a small pick or screwdriver.
Core plugs or other openings can be masked by first going around the outer edges with multiple shorter pieces of tape and then balling up larger pieces of tape and pushing them into the holes. It might take a few pieces to get enough coverage on the larger holes.
Also make sure when you mask of the engine stand that you do it in a way so that you can still rotate the block. It is much easier to get into the harder to reach places like the engine rear by rotating the block to a different orientations.
Satisfied with your masking job, double check you didn’t miss any important features you don’t want painted. It is a lot harder to remove paint after the fact then mask it off now.
Wax and Grease Remover
Before painting we decided to do a final clean with wax and grease remover just prior to painting.

We lightly soaked coffee filters in wax and grease remover and then wipe down all the surfaces to make sure there was no lingering oil or dirt.

After wiping down all the block surfaces spray with dry clean compressed air to remove any coffee filter fibers or lint.
Priming The Engine Block
Painting outside is not always ideal as you can pick up dust and debris from the environment. Unfortunately we don’t have a paint booth and I’d rather not get overspray all over the garage so we picked a day that was warm outside with minimal wind.

Shake the can well before spraying. As always follow the recommend directions on the can from the manufacturer. Here we are using Duplicolor Engine Enamel DE1612 Grey Primer.

Start off using light coats. We have found you will get a better finish with several lighter coats followed by a heavier wet coat at the end.
The multiple lighter coats help prevent runs and ensures full coverage of the engine block where the shapes and features can make it difficult to get into all the corners and edges.

The first coat might not get all the coverage you want but it is better to do a light coat of most of the block then come back and do a light coat of the features instead of trying to do it all at once and risking heavy spots or runs on the surrounding areas. Wait about 10 minutes between the light coats or when you can see the paint is dry and flashed off.

After you have good coverage with the light coats you can then go in and do a final medium coat to get a nice finish. We then waited about 1 hour for the primer to dry completely before moving on to the color coat. While the primer was drying we wheeled the engine into the garage to try and keep it free of dust and debris.
Painting the Color Coats
With the primer flashed off it was time to get the color on the block. We are using Duplicolor Engine Enamel 1610 Pontiac Blue, it is a close but not perfect match to the original blue/green of Datsun engine blocks.
Before you spray the color coats just check over the block for any debris that might of stuck to the paint. You can pick off small items like hairs or small bugs with tweezers without ruining the finish.
Make a first very light color coat. With the features and shape of the block it might not be possible to get into all the little crevices without making the rest of the paint too thick. So we use several light coats from different direction to get full coverage and ensure we get a nice even finish. Rotating the engine block to different orientations can help you get into all the various areas.

Just like the primer use several very light coats building up the coverage rather than a single thick coat that can lead to paint runs. Follow the same guidance on the can, about 10 minutes between coats depending on temperature. You will get a feel for when it has flashed off and as it will look almost dry.

A final slightly thick wet coat goes on the block to give it a nice glossy finish and complete the coverage.

Here you can see in direct sunlight the shine we got on the block with the final coat. It looks much better than the old combo of exposed cast iron and orangey red paint. In this lighting the paint looks very green.

After the painting was completed we brought the block inside to let it cure and try to keep it out of the wind and dust.
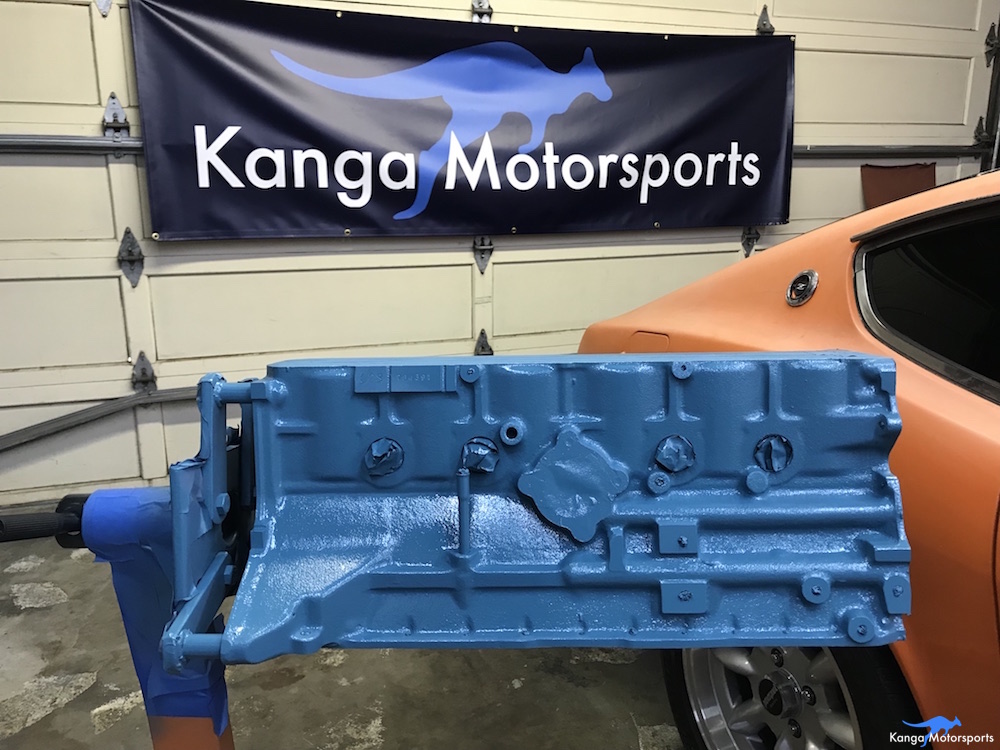
Depending on the lighting the block either looks really blue or more of a green blue. It isn’t the perfect shade of Blue/Green from the factory but it is pretty close. If you want to get the perfect shade there are a few specialty Datsun vendors that can have the paint mixed up and put into rattle cans.
Want more Datsun 240z articles and tech tips? Sign up for our Kanga Motorsports Newsletter
Other Datsun Engine Build Articles