
In Endurance racing it is important to have radio contact with the driver. The driver can let the pit crew know about issues with the car and if they are coming in unexpectantly. The crew can let the driver know of track conditions, fuel usage and any incidents ahead. Installing a radio into a helmet takes a little care but can be done with a few simple tools.

Questions to Answer Before Install
Which Type of Plug? IMSA, NASCAR or other?
There are two main type of plugs (IMSA and NASCAR) and a few other specialty ones. Depending on which car you drive most often will determine which of these plugs you want. You can always buy adapters for the other type of plugs but will have to remember to carry them with you. A good tip for adapters before a race if you know you need an adapter slide a bit of heat shrink tubing over the adapter and then plug it in. Use a heat gun and seal the connection with the heat shrink that should provide a good tight and water resistant fit. This should mean you won't lose the adapter during a pit stop. You can then cut away the heat shrink after the race and remove the adapter.
Which Side to Install? Left or Right?
Which side you install will depend on where you are in the world (left hand vs right hand drive) and the type of car you are in. It won't matter much as most cars will have a cable long enough so that you can connect on either side. If you are doing endurance races check with your co-drivers and see which side they use. It might be easier if you are consistent with the team.
Spiral Cable or Straight?
The straight cable can be great if you know the car well, know your length and you are use to plugging it in. The spiral cable provides some spring and gathers up the cable. Most drivers I see prefer the coiled spiral cable as it is less likely to get tangled up in the cockpit.
Ear Buds or Speakers?
There are some helmets on the market that provide excellent ear cups with noise attenuation and fit snuggly over the ears. The cups can also have small speakers added to the them. Unless you have one of those helmets you are going to need ear buds. There are a few different types including basic foam tips, transducers with foam tips, semi-custom and full custom ear buds. If you are on a budget you can get basic foam tips but at a minimum I would recommend those with transducers you will hear better and clearer. The custom and semi-custom also use the high performance transducers. The semi-custom have more of a shape than foam buds allowing them to contours to your ear. The full custom allows you to take a mold of you ear and send it in to the manufacturer to make custom ear pieces for your specific ears. The other good thing is you can take your foam transducers and have them upgraded to custom pieces later if you have some more cash. I chose the foam tipped transducers as a good starting point on a budget.
Type of Mic?
There are a few types of Microphones available typically the more expensive the higher quality. If you are in a quieter enclosed cockpit car you might be able to get away with a cheaper microphone. If you are in an open cockpit or louder car you will want to get a higher quality microphone that cancels out the external noise. As I race in an open cockpit car I spent the extra dollars for a better microphone.

Tools and Equipment Needed
Helmet
Helmet radio kit:
Microphone and Sock
Ear Pieces / Plugs
Head Phone / Ear Cup Jack
Radio Connector Cable
P-Clamps
Rivets
Washers
Large Bowl
Towel
Screwdriver
Masking/Painters Tape
Sharpie
Trim Removal Tool
Exacto Knife
Drill and 1/8th inch Drill Bit
Rivet Gun
Heat Gun
Zip Ties
Side Cutters
Hot Glue Gun

Installing the Helmet Radio
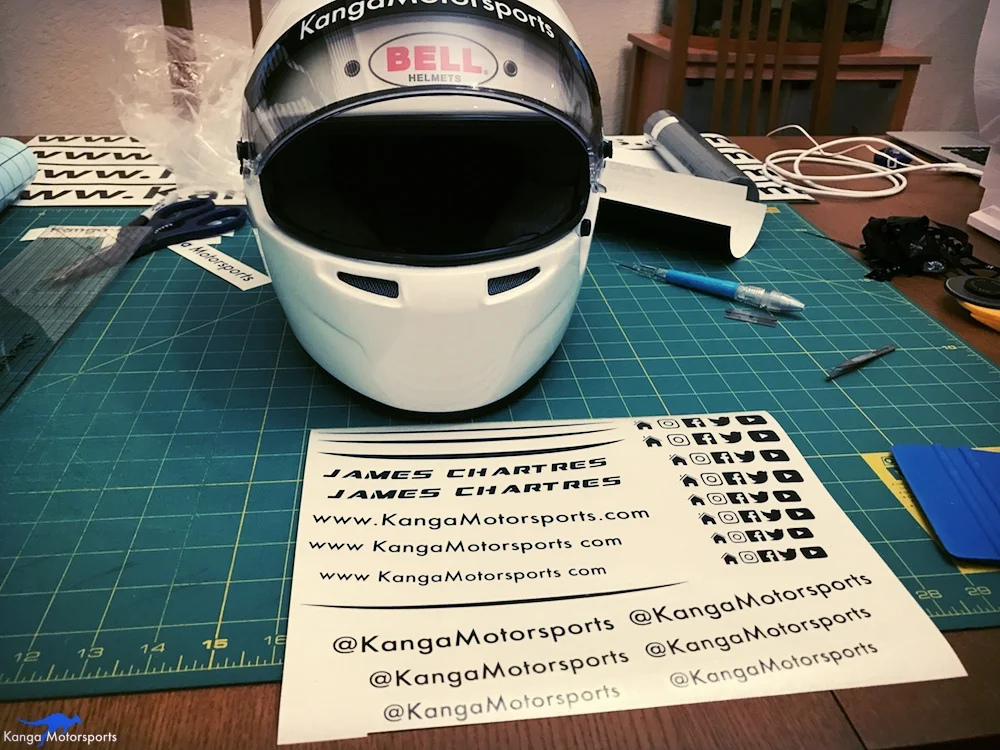
Gather together the tools you are going to need. I like to start by removing the visor to prevent any scratches and give yourself a little working room. If you would rather leave it on, you can do that too.

You will be working with the helmet upside down. To prevent the helmet from rolling all over the place, put it in a bowl. I use a towel inside the bowl to give it a little cushioning and prevent scratches.

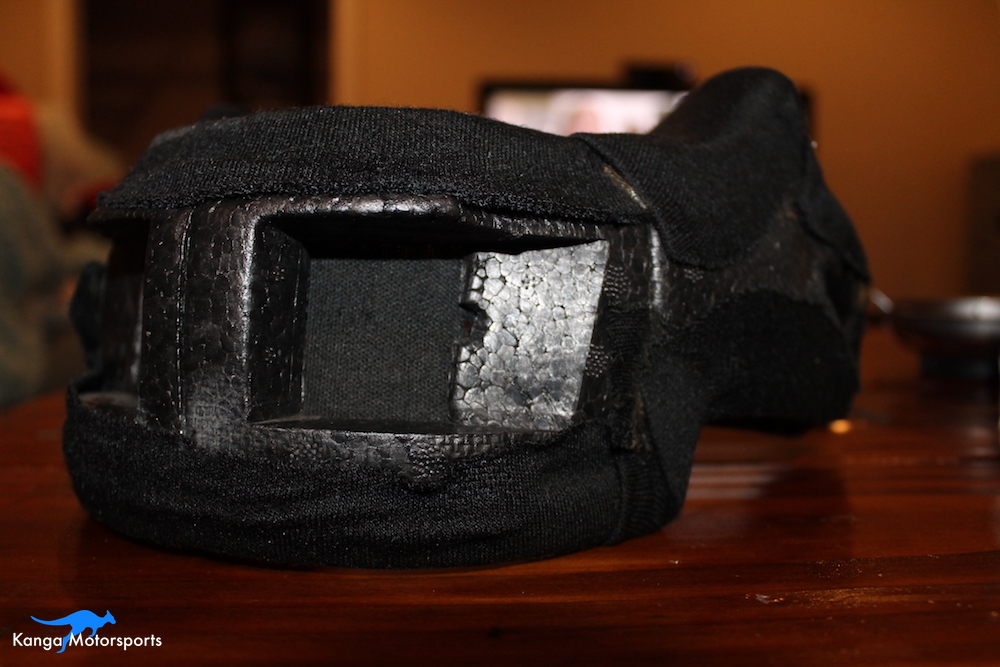
Next you will need to remove the cheek pad. Depending on the helmet design this might be a singular piece or a piece from each side. On my Bell helmet I had to pull back a thin foam skirt and then remove a single piece chin pad. Be careful not to rip anything apart, gentle prying is all you should need. You can normally just do this with your hand, but if the glue is tough you can use an interior trim removal tool to give you some leverage or slowly work the edge of the glue away. You might have to guide the chin straps out through the cheek pads like I did.

Choose which side of the helmet you want the boom microphone.
The most important part of the installation is to position the microphone. You want to make sure it is close to you lips and pointing in the right direction. The microphone I had used a little tab that should be away. Some microphones have a painted symbol to indicate front.
Remove the sock from the microphone to make it easier to put in place.
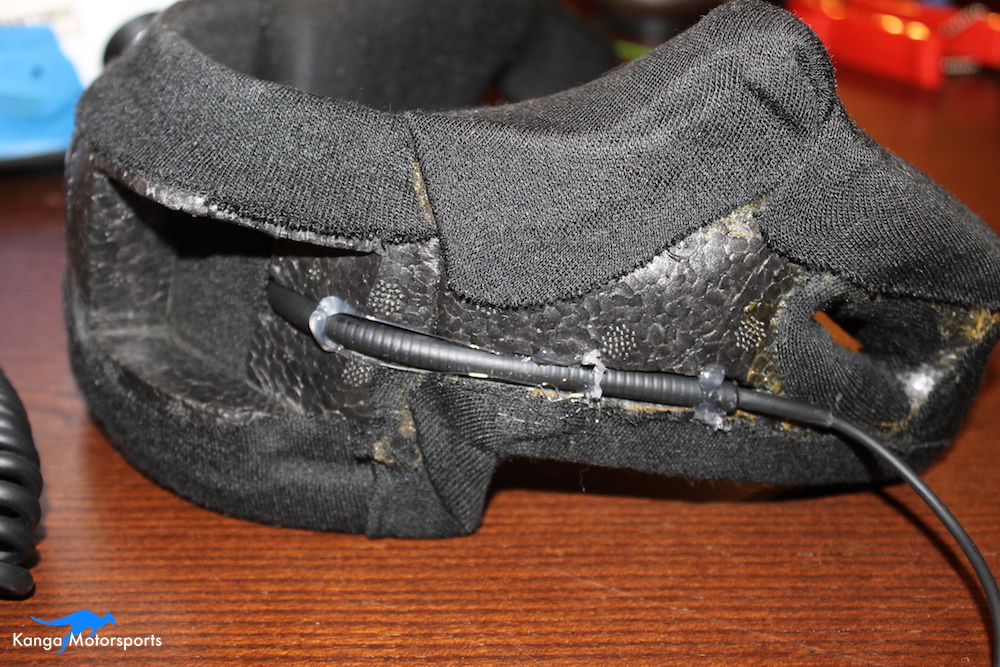
Use the exacto knife to cut a small hole in the foam or fabric and slide the microphone boom into place.

With the microphone in place you can now line up the boom on the cheek pad and see where some of the padding material needs to be removed.

Use the exacto knife to remove material for the cheek pad. I took it slow, removing small pieces at a time. I worked from the microphone back, positioning the boom as I went to measure the next section and then moving it out of the way to do the cutting. I found a combination of using the exacto knife to cut the slices followed by a thin flat blade screwdriver as a chisel to remove the foam worked best.

When you have the boom placed correctly do a test fit against your face and make sure the microphone is in the right position.

When you are happy with the microphone position and boom placement use a bit of painters tape to hold it all in place.
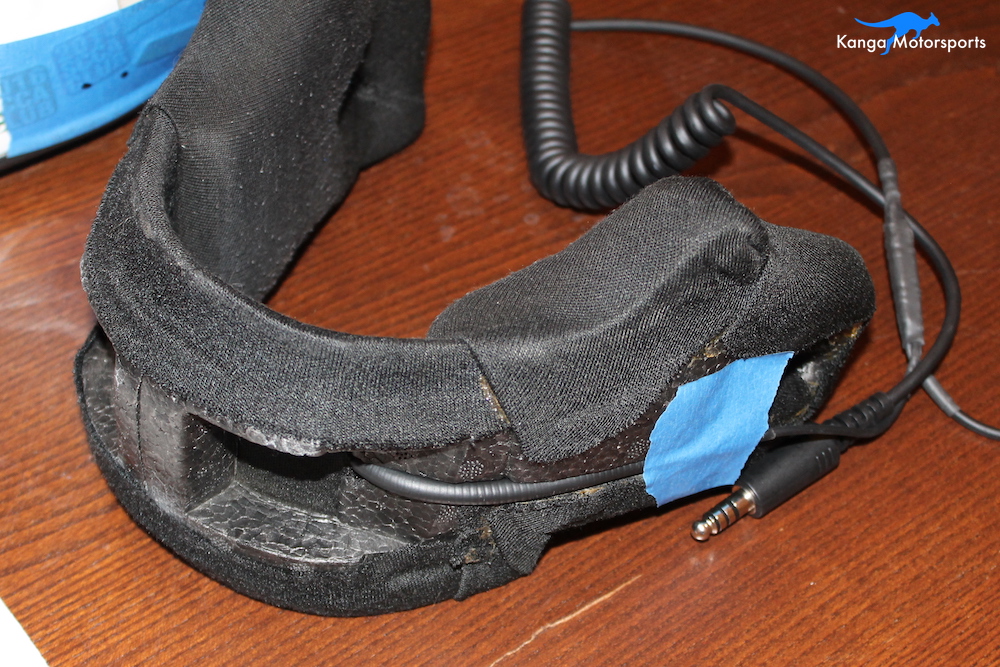
Secure the microphone and boom in place using the hot glue gun. Less is more here. Just use enough glue to hold it in place without smothering the boom.
Re-install the microphone sock by sliding it all the way over the microphone and then guiding the small o-ring into place.

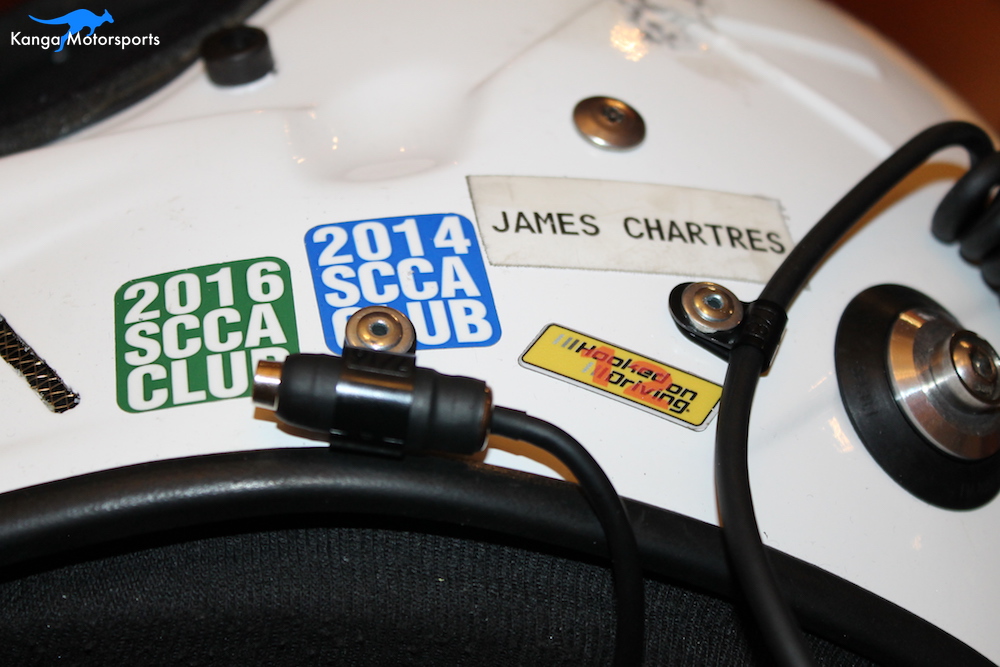
Now you need to anchor the ear bud jack and radio connect cable. Use some blue painters tape on the side of the helmet and a sharpie to mark the holes. I used extra painters tape to help position the jack and cable making sure they were out of the way of my HANS.
When you are happy with the placement and direction, use the provided P-clamps around the ear bud jack and cable to mark the needed holes for the rivets.
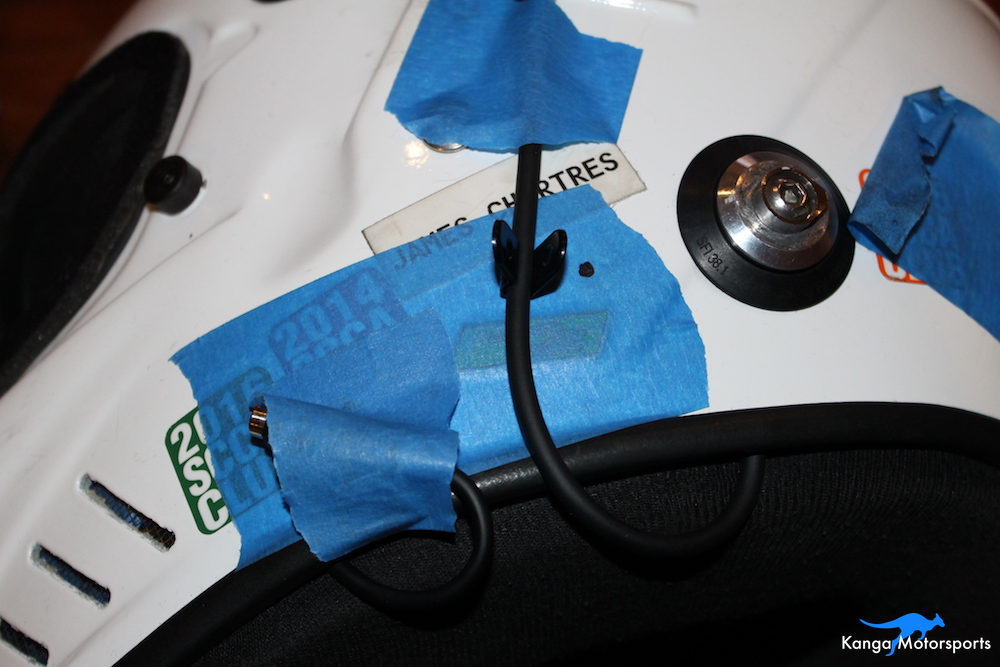
With the holes marked move the p-clamps and cables out of the way. You can see here I marked 3 holes. I only needed two but decided to move the ear bud jack further forward to avoid a kink in the cable.

Use painter tape to help protect the helmet surface and prevent chips when drilling a hole.
Drill two holes with an 1/8th inch drill bit.

Remove the painters tape and you should have nice clean holes without any chips or cracks.

Rivet the ear bud jack in place using the provided p-clamp, washers and rivet with your rivet gun. The washer should go on top of the p-clamp. If the kit has extra washers they go at the back against the helmet shell to prevent pull out.

Rivet the radio cable jack into place. Make sure that the cable is out of the way and doesn't interfere with HANS device.

The ear bud jack and radio jack cable are now riveted in place.
With the system riveted in place the cheek pad will be dangling you will need to secure the cables inside the helmet out of the way.

Using the helmet strap anchor you can zip tie some of the cables up and out of the way. Make sure there are no kinks or sharp bends in the cables.
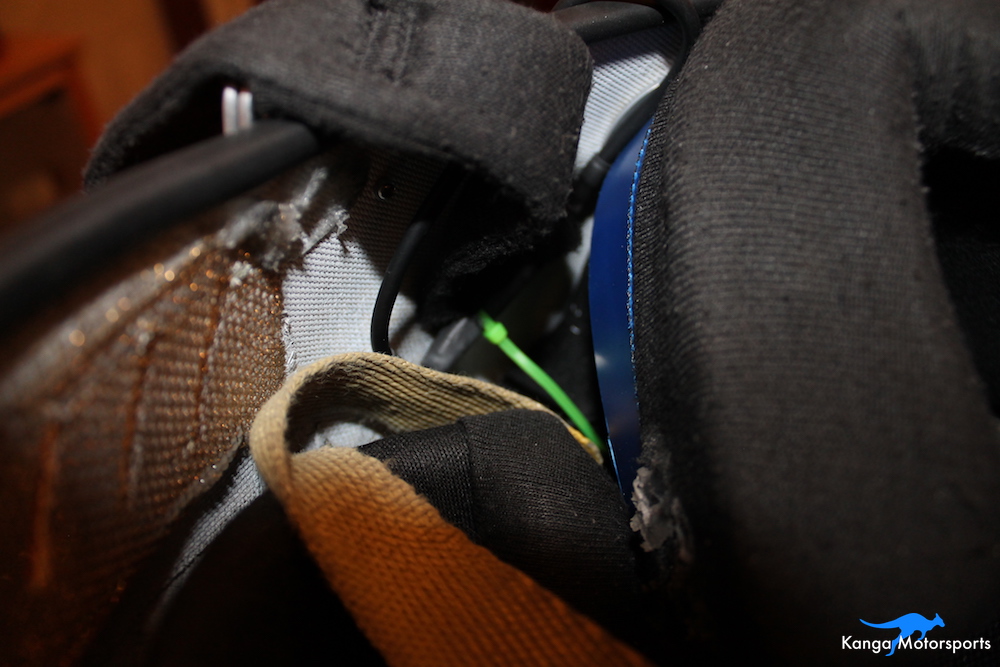
Check the cable fit placement with the cheek pad. Again make sure there are no kinks or sharp bends.

Do a final test fit for the cheek pads, cables and microphone. Put the helmet on and make sure you are happy with all the placements, adjust if necessary.

Use the hot glue gun to install the cheek pad or padding back into place. Glue where you previously separated the padding away from the helmet. Use as little glue as possible. Press down firmly holding in place until the glue hardens.

If you removed the visor put it back into place. Now you are done, time to test it with the radio.

Have fun chatting away with your pit crew at the next race.
Want more racing tips and motorsports articles, sign up for our Motorsports Newsletter.
More Tech Tips


We decided to replace the old bent and misshaped suspension rockers with the new lighter and stiffer tubular rockers. The step by step guide should make it easier for those attempting the work themselves.